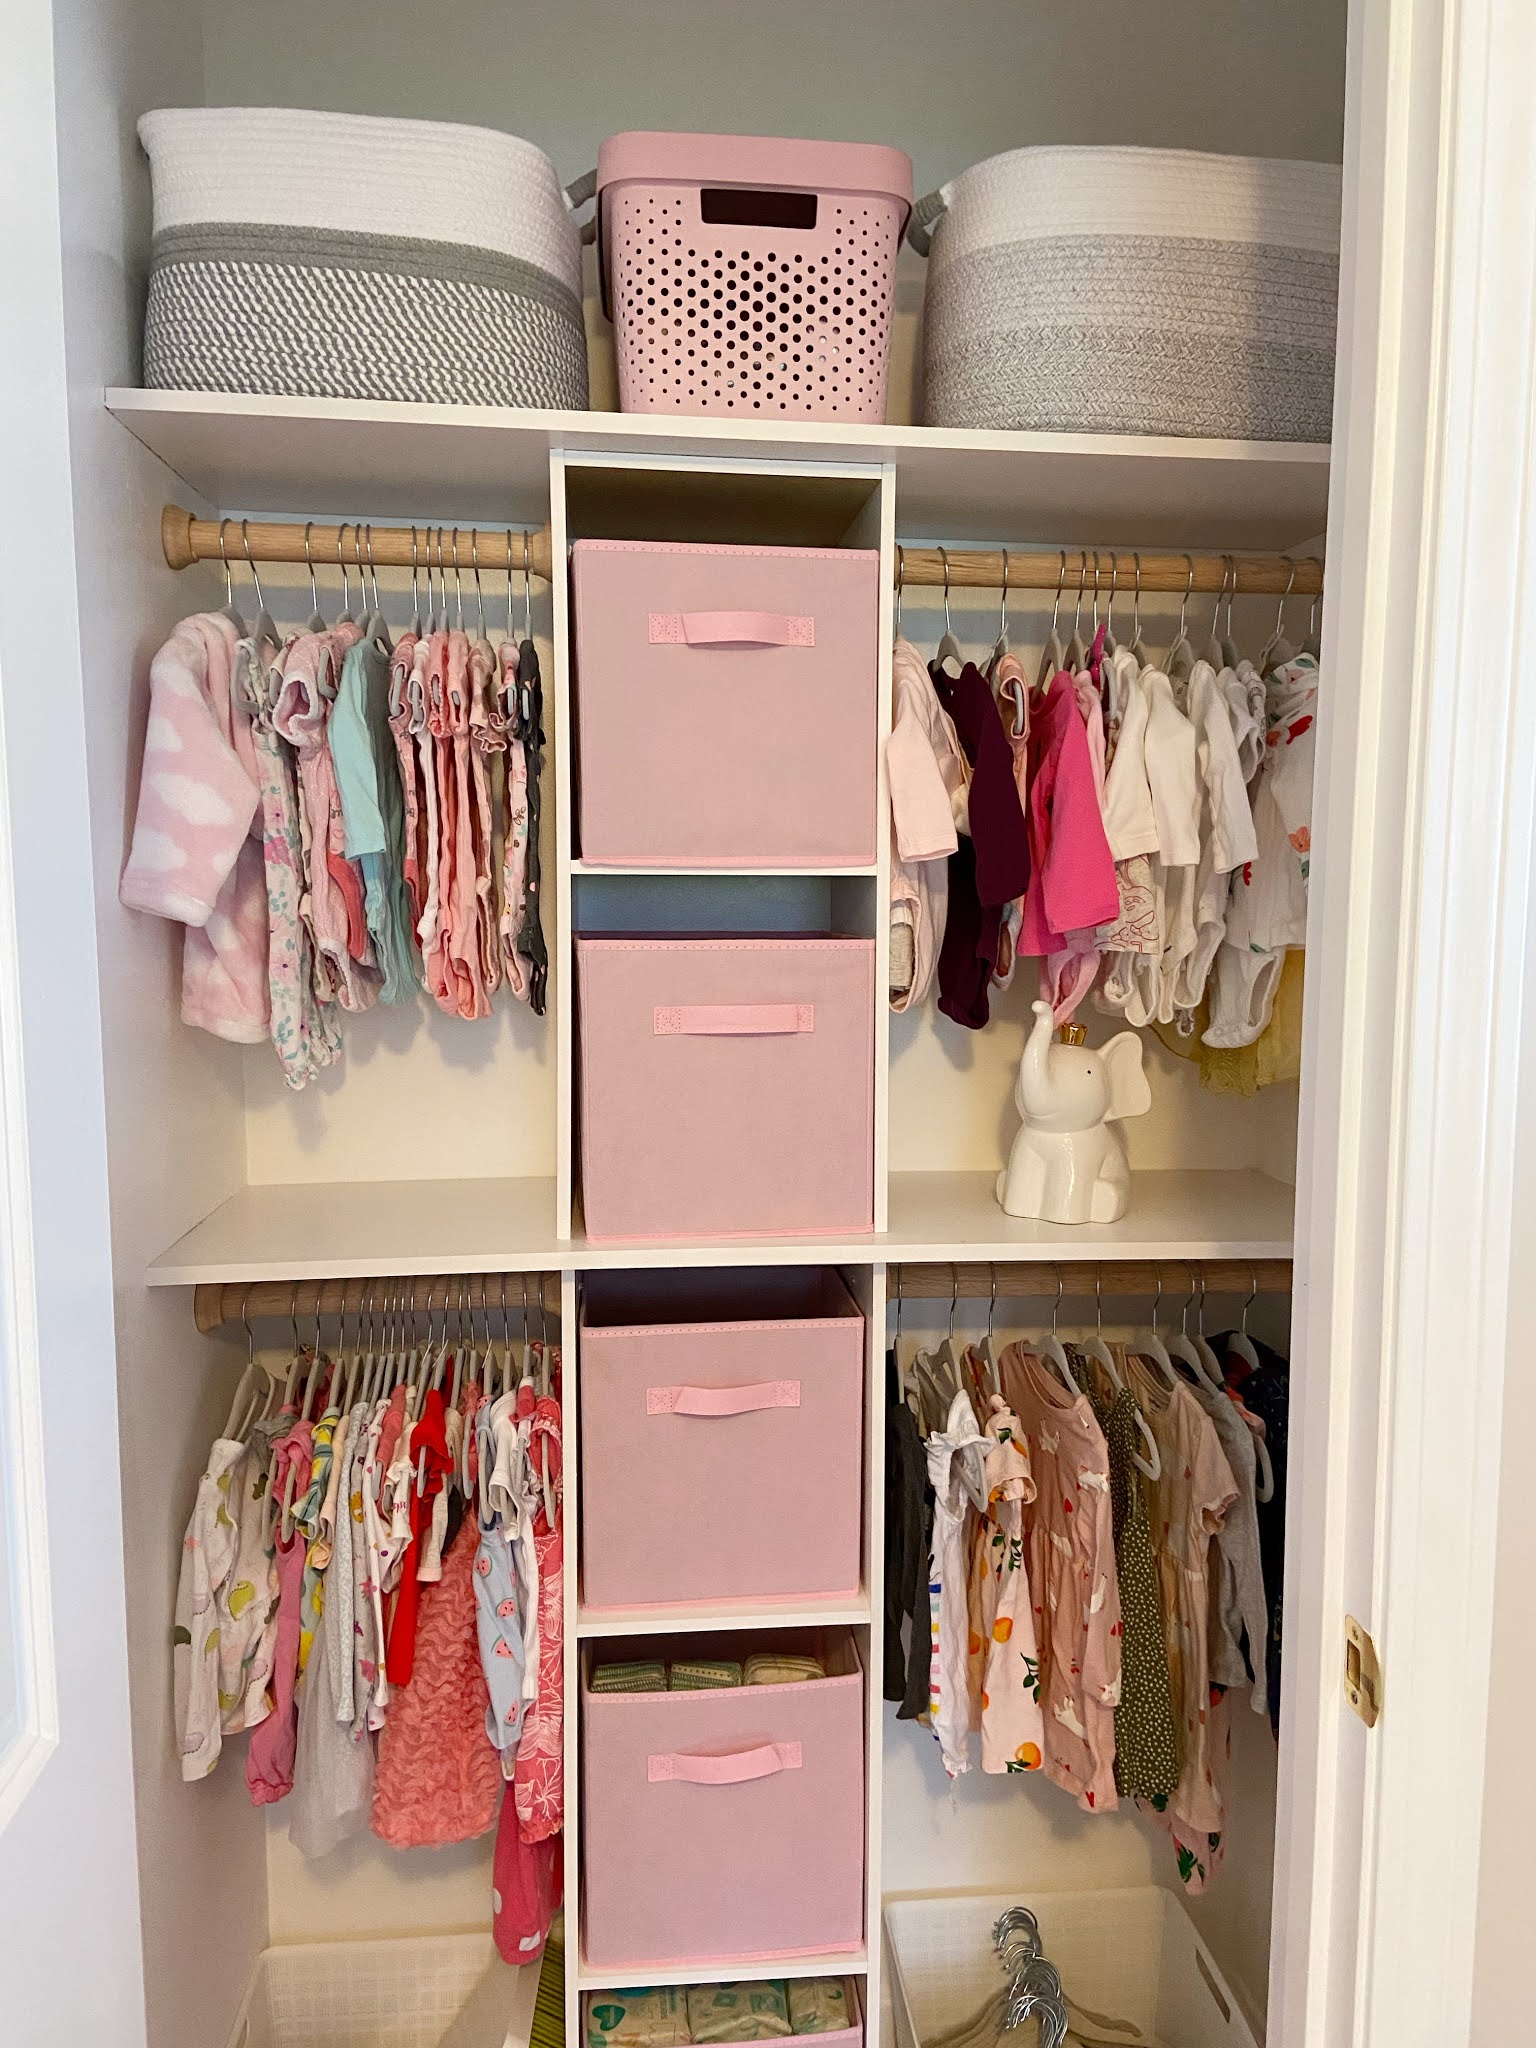
Happy Monday everyone! Today is my official 4th of July holiday and it is always so nice to have a three day weekend. I personally think that having three day weekends every weekend would make for a much happier lifestyle, can we make this a reality? Today I wanted to share our DIY nursery closet which was finally completed this weekend. We have been working on this closet for quite some time and it finally ready to go!
Overall, creating the structure of it was not difficult and did not cost much at all. I ended up picking a design based off of The Greenspring Home blog and although we are not great DIYers, I think the closet turned out great and wasn't necessarily super difficult if you are a beginner DIYer.
Supplies Needed
Closetmaid Vertical Organizer
2 Closetmaid White Laminate Mounted Shelves
Closetmaid White Metal Shelf Bracket Support Kit (optional- we didn't end up using ours because we aren't going to be storing anything super heavy on these shelves)
Wood Closet Rod
Wood Closet Rod Pole Sockets (2 Piece)
Step by Step
First of all, disassemble any previous closet structure. We had a wire shelf with a single hanging rack installed in this closet- think builder grade materials. I actually really despise wire shelving, I think it looks super cheap and was not a fan of the single hanging rack because baby clothes are so tiny. There is so much wasted space underneath them when hanging. One afternoon I got my screwdriver out and used my muscles to pull the wire shelving out of the closet. It was anchored in and involved some serious tugging, but I only needed Tim to help me with one anchor that I just could not get out of the closet.
Once your old closet system is out of the closet you will probably need to patch holes and paint. I patched all the holes myself, sanded everything down and then painted. I didn't do a super thorough job painting since we would be installing a new system and you wouldn't be able to really see the paint job behind it anyways.
Here is the closet, patched and ready for the new system to be installed.
After you've completed this, you want to build the vertical closet organizer. What I did was build the bottom three bottom squares and then built two more separately knowing that a shelf would separate them. This left one square unused because it wouldn't fit nicely in the closet with the two shelves I wanted.
Now before actually installing anything we did some measurements. I wanted the vertical organizer to be centered in the doorframe which meant that it was not centered in the closet. We measured both sides to figure out how long we needed the wooden dowel to be cut since we wanted four hanging sections. We also had to cut the shelves since they were a little too long for our particular closet.
Here is the closet laid out without the wooden racks installed yet.
I also purchased some
storage cube bins from Amazon. I picked the pastel pink but there are a variety of colors depending on your preference. I really wanted to lean into the light pink for our little girls closet. I filled these and then pulled them back out so Tim could install the wooden clothing racks.
Tim took the lead on installing the dowels and then wood glued them into place. Then the following morning it was time to fill the closet!
I measured all the areas available and then headed to HomeGoods to pick up some bins for the top and bottom of the closet. I also grabbed some more hangers so I could get all of her non-pajama outfits on hangers.
All the baskets were purchased from HomeGoods so I unfortunately don't have links for them.
I also got the adorable elephant piggy bank at HomeGoods. I thought it would be a sweet subtle decoration that will also come in handy to collect change.
I haven't finalized the organization of the closet yet, but I will share what I've done so far. The top left basket holds muslin swaddle blankets. The middle pink bin holds bottles and pacifiers that will need to be sanitized. The top right basket holds our infantino baby carrier.
The top left hanging section is for newborn and 0-3 month clothing. The top right hanging section is 3-6 month clothing.
The top two pink bins hold clothing and shoes that have been handed down to us but are in much larger sizes. We won't be using 2T items for quite some time but I haven't established a system for clothes to grow into so for now they will live in these bins.
The bottom left hanging section is 6-9 month clothing and the bottom right is 9-12 month clothing. I realize that it is a little silly to hang all of this in the closet, but I know our sweet Ellie will be growing out of clothes so fast I think it will be easiest to keep everything hung during the first year and rotate sections out as she grows. Once she is a size for more than just a few months I will section the closet off by clothing type instead of size and keep sizes that she will grow into elsewhere.
The three pink bins hold burp cloths and bibs, wipes and size 1 diapers. These diapers are the backups to the changing station I have set up with newborn and size 1 diapers. Since we are unsure if she will wear newborn diapers from birth, I set up a section of them for her but also set up size 1 diapers in case she goes right into those. I also have several drawers in the nursery filled with extra diapers that are still in packaging, but these are diapers that were taken out of their packaging for a quick refill.
The bottom of the closet bins hold feeding supplies on the left (boon drying rack, breast milk storage bags, nipple pads, etc) and extra hangers on the right.
As I mentioned, I haven't exactly figured out my organization systems in here yet but this is a good start and I can certainly adjust as we go forward and see what we need.
Here are two quick sneak peeks of the rest of the nursery....
There is still a lot to do, but I feel so much better about the status of the nursery! My mom is throwing us a baby shower in a couple of weeks and they are throwing me one at work the following week so I know we will have more items to organize in here, so I'm trying to not go too crazy.
Now, one last look at the gorgeous closet...
Ahh so pretty! Have a great day everyone!!