Showing posts with label diy. Show all posts

Monday, July 5, 2021

DIY Nursery Closet Details

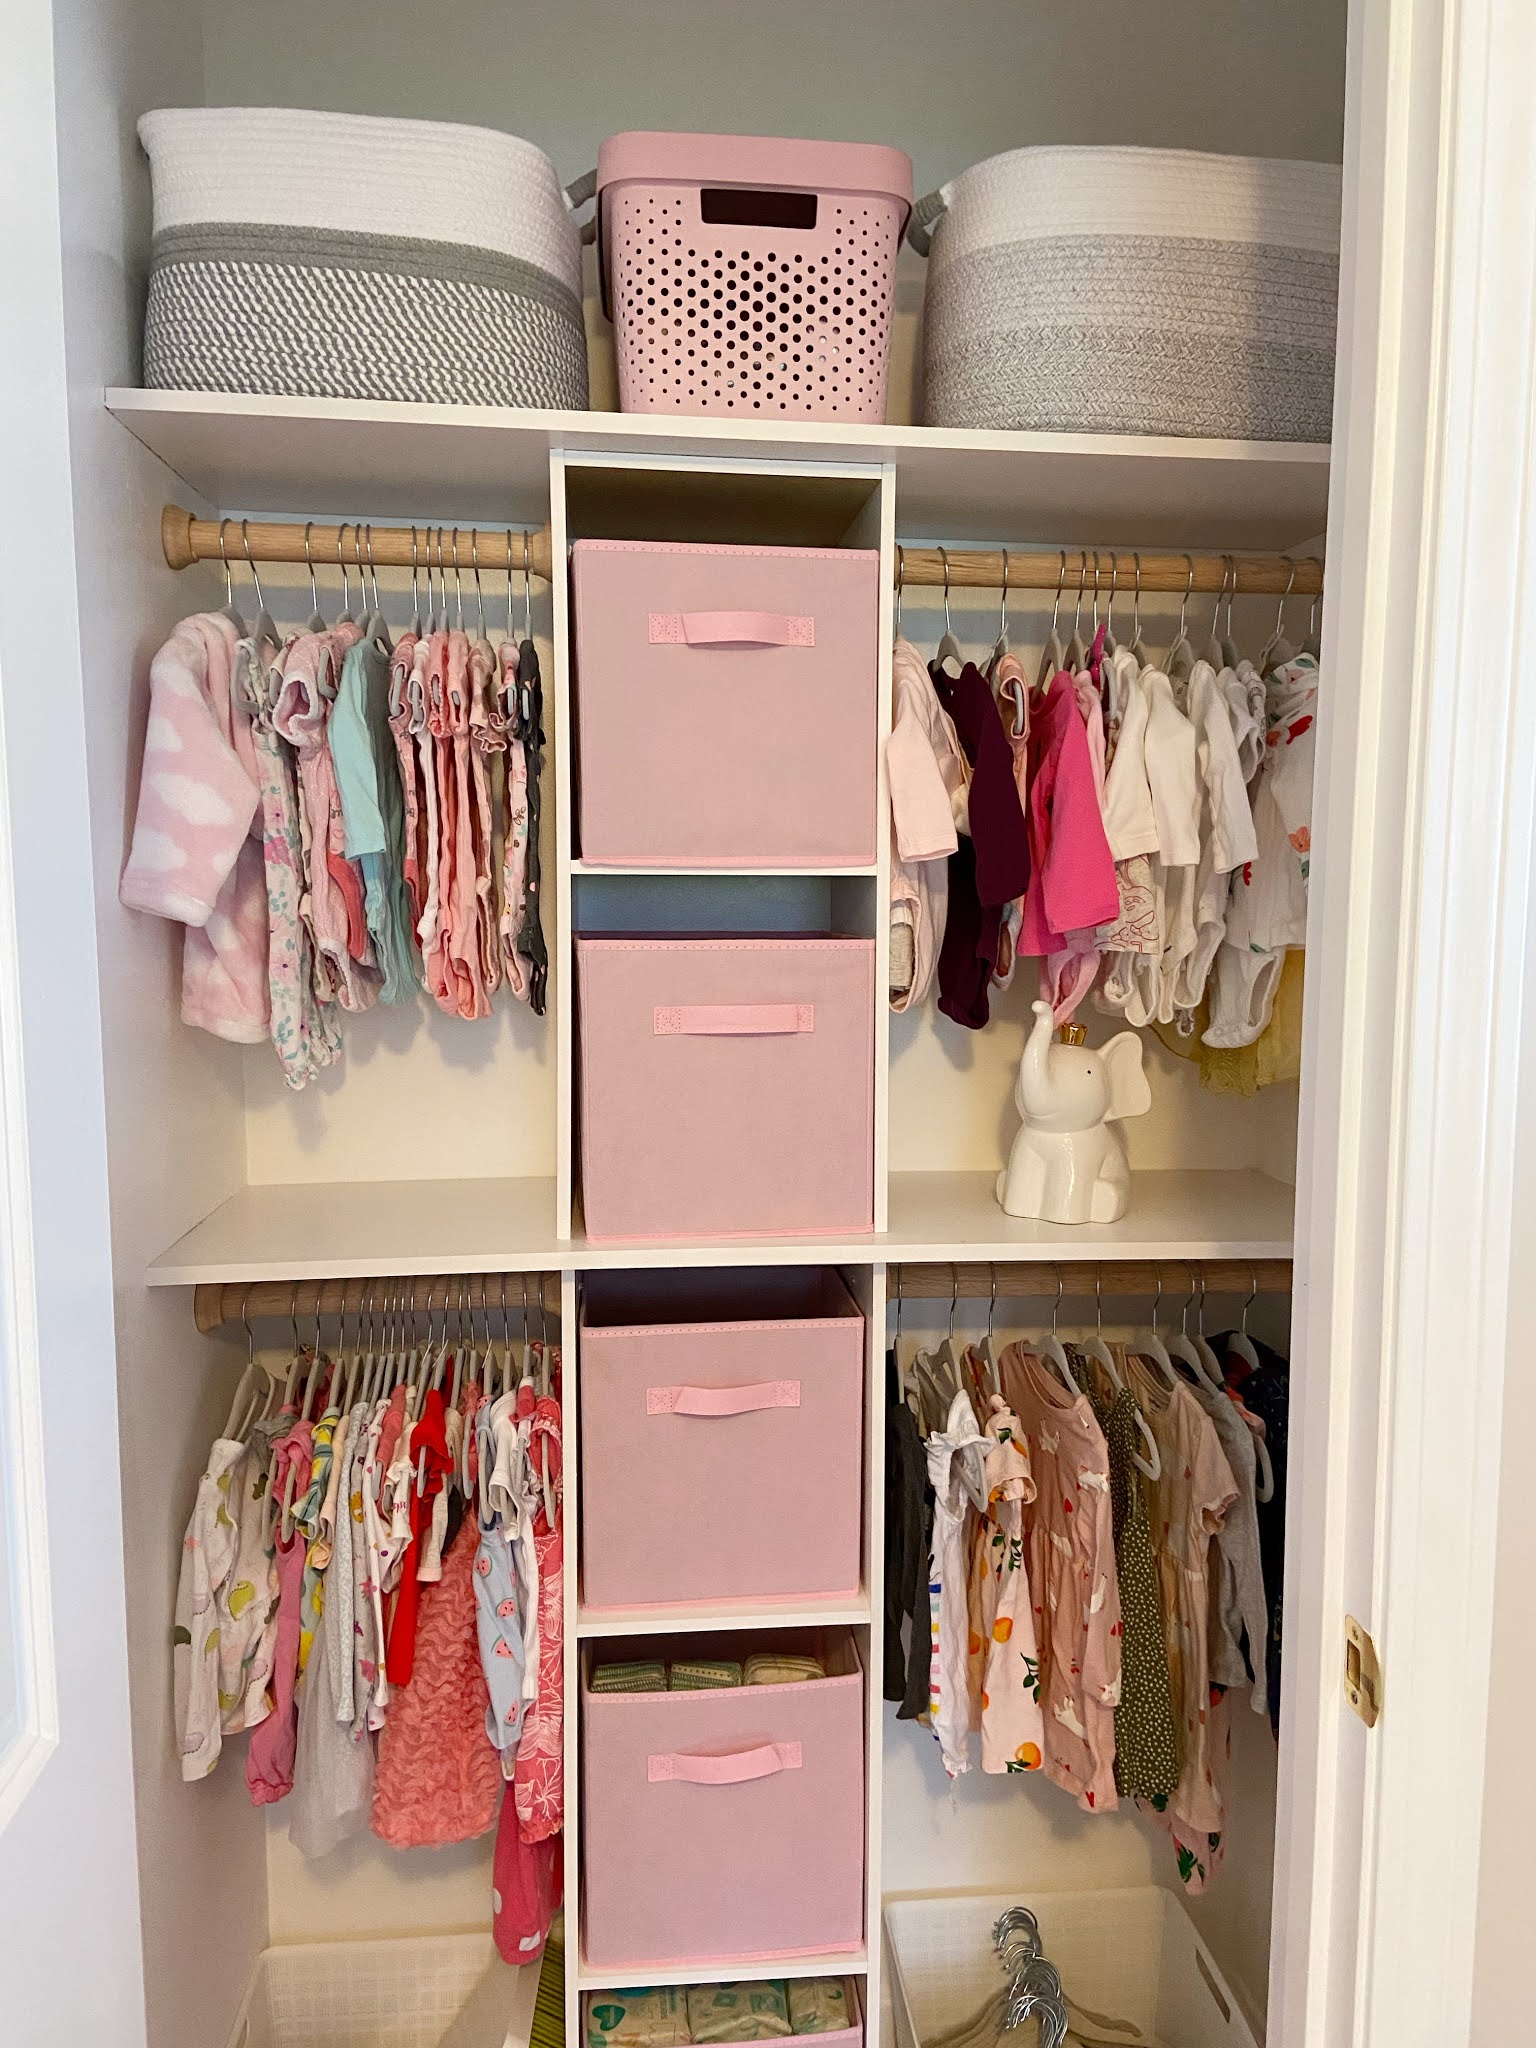
 Happy Monday everyone! Today is my official 4th of July holiday and it is always so nice to have a three day weekend. I personally think that having three day weekends every weekend would make for a much happier lifestyle, can we make this a reality? Today I wanted to share our DIY nursery closet which was finally completed this weekend. We have been working on this closet for quite some time and it finally ready to go! 


Overall, creating the structure of it was not difficult and did not cost much at all. I ended up picking a design based off of The Greenspring Home blog and although we are not great DIYers, I think the closet turned out great and wasn't necessarily super difficult if you are a beginner DIYer. 


Supplies Needed

Closetmaid Vertical Organizer 

2 Closetmaid White Laminate Mounted Shelves 

Closetmaid White Metal Shelf Bracket Support Kit (optional- we didn't end up using ours because we aren't going to be storing anything super heavy on these shelves)

Wood Closet Rod

Wood Closet Rod Pole Sockets (2 Piece)


Step by Step

First of all, disassemble any previous closet structure. We had a wire shelf with a single hanging rack installed in this closet- think builder grade materials. I actually really despise wire shelving, I think it looks super cheap and was not a fan of the single hanging rack because baby clothes are so tiny. There is so much wasted space underneath them when hanging. One afternoon I got my screwdriver out and used my muscles to pull the wire shelving out of the closet. It was anchored in and involved some serious tugging, but I only needed Tim to help me with one anchor that I just could not get out of the closet.


Once your old closet system is out of the closet you will probably need to patch holes and paint. I patched all the holes myself, sanded everything down and then painted. I didn't do a super thorough job painting since we would be installing a new system and you wouldn't be able to really see the paint job behind it anyways.


Here is the closet, patched and ready for the new system to be installed.

After you've completed this, you want to build the vertical closet organizer. What I did was build the bottom three bottom squares and then built two more separately knowing that a shelf would separate them. This left one square unused because it wouldn't fit nicely in the closet with the two shelves I wanted. 


Now before actually installing anything we did some measurements. I wanted the vertical organizer to be centered in the doorframe which meant that it was not centered in the closet. We measured both sides to figure out how long we needed the wooden dowel to be cut since we wanted four hanging sections. We also had to cut the shelves since they were a little too long for our particular closet.


Here is the closet laid out without the wooden racks installed yet. 


I also purchased some storage cube bins from Amazon. I picked the pastel pink but there are a variety of colors depending on your preference. I really wanted to lean into the light pink for our little girls closet. I filled these and then pulled them back out so Tim could install the wooden clothing racks. 


Tim took the lead on installing the dowels and then wood glued them into place. Then the following morning it was time to fill the closet!


I measured all the areas available and then headed to HomeGoods to pick up some bins for the top and bottom of the closet. I also grabbed some more hangers so I could get all of her non-pajama outfits on hangers.


All the baskets were purchased from HomeGoods so I unfortunately don't have links for them. 


I also got the adorable elephant piggy bank at HomeGoods. I thought it would be a sweet subtle decoration that will also come in handy to collect change.


I haven't finalized the organization of the closet yet, but I will share what I've done so far. The top left basket holds muslin swaddle blankets. The middle pink bin holds bottles and pacifiers that will need to be sanitized. The top right basket holds our infantino baby carrier.

The top left hanging section is for newborn and 0-3 month clothing. The top right hanging section is 3-6 month clothing.

The top two pink bins hold clothing and shoes that have been handed down to us but are in much larger sizes. We won't be using 2T items for quite some time but I haven't established a system for clothes to grow into so for now they will live in these bins.


The bottom left hanging section is 6-9 month clothing and the bottom right is 9-12 month clothing. I realize that it is a little silly to hang all of this in the closet, but I know our sweet Ellie will be growing out of clothes so fast I think it will be easiest to keep everything hung during the first year and rotate sections out as she grows. Once she is a size for more than just a few months I will section the closet off by clothing type instead of size and keep sizes that she will grow into elsewhere. 

The three pink bins hold burp cloths and bibs, wipes and size 1 diapers. These diapers are the backups to the changing station I have set up with newborn and size 1 diapers. Since we are unsure if she will wear newborn diapers from birth, I set up a section of them for her but also set up size 1 diapers in case she goes right into those. I also have several drawers in the nursery filled with extra diapers that are still in packaging, but these are diapers that were taken out of their packaging for a quick refill.

The bottom of the closet bins hold feeding supplies on the left (boon drying rack, breast milk storage bags, nipple pads, etc) and extra hangers on the right.

As I mentioned, I haven't exactly figured out my organization systems in here yet but this is a good start and I can certainly adjust as we go forward and see what we need.

Here are two quick sneak peeks of the rest of the nursery....


There is still a lot to do, but I feel so much better about the status of the nursery! My mom is throwing us a baby shower in a couple of weeks and they are throwing me one at work the following week so I know we will have more items to organize in here, so I'm trying to not go too crazy. 

Now, one last look at the gorgeous closet...


Ahh so pretty! Have a great day everyone!!


Monday, December 14, 2020

DIY Homemade Bath Bombs


I've been dying to make bath bombs for years and this weekend I finally got the motivation to get it done. If you've never made homemade bath bombs before it's not a hard process at all, but definitely does require a little bit of planning.

Here is everything I needed for this batch of bath bombs (made 4 for me, but if I hadn't spilled some of my ingredients I might've been able to get 5 out of this)

Ingredients

  • 1 cup baking soda
  • 1/2 cup citric acid
  • 1/2 cup corn starch
  • 3/4 cup epsom salt
  • 20 drops essential oil (I used peppermint)
  • 2 tablespoons coconut oil
  • coloring pigment
  • bath bomb mold
some notes on the ingredients....

  1. Citric acid took me forever to find in Walmart. Turns out it is in the canning section with the glass canning jars. I hope you manage to find it faster than I did!
  2. I purchased my coloring pigment here. Mine is specifically made for making soaps and things like that. I like that this kit came with quite a few colors, but I used almost the entire pink bottle to make these few bath bombs, so I might look for a larger kit in the future. 
  3. Here is the bath bomb mold I purchased. This is a set of two which would be great if you are making more than one color/scent and don't want to wash in between. Also, super cheap which I appreciate. 
  4. I did not melt my coconut oil, but I would recommend that you do. It will definitely combine easier and that makes the whole process go smoothly. 
  5. I did add a little bit of water to my mixture because it wasn't sticking together easily. I think if I had melted my coconut oil I wouldn't have needed to use water, but if you are struggling definitely add a little water.
Directions

  1. In a large bowl (I used a metal bowl, but I'm not sure that it matters), mix baking soda, citric acid, corn starch and epsom salt. Be VERY careful with the citric acid.  It does react and rise up and it is awful when it gets up your nose. 
  2. After combining dry ingredients, carefully add your essential oils, coconut oil and coloring pigment.
  3. Once everything is combined well you can begin scooping into the mold. 
  4. Make sure you pack the mold really tight. Really push the mixture down into it. Pack each side tightly and overfill each side so you can connect them together. 
  5. Once both sides are overflowing, push them together. Push really hard. When you think that you've pushed long enough, push some more. Then twist and pull one side of the mold off and carefully remove the bath bomb.
  6. Leave out for 24 hours before using to dry!

This time I made peppermint bath bombs, but I am looking forward to using different oils in the future. I foresee myself making lavender bath bombs soon, and would love to make more seasonal ones as gifts for friends and family!

I want to try to make some body scrub next and I could definitely see myself making lotions and candles as well. What are some of your favorite DIY recipes?

Monday, October 19, 2020

Privacy Fence is Up and Future Garden Ideas!

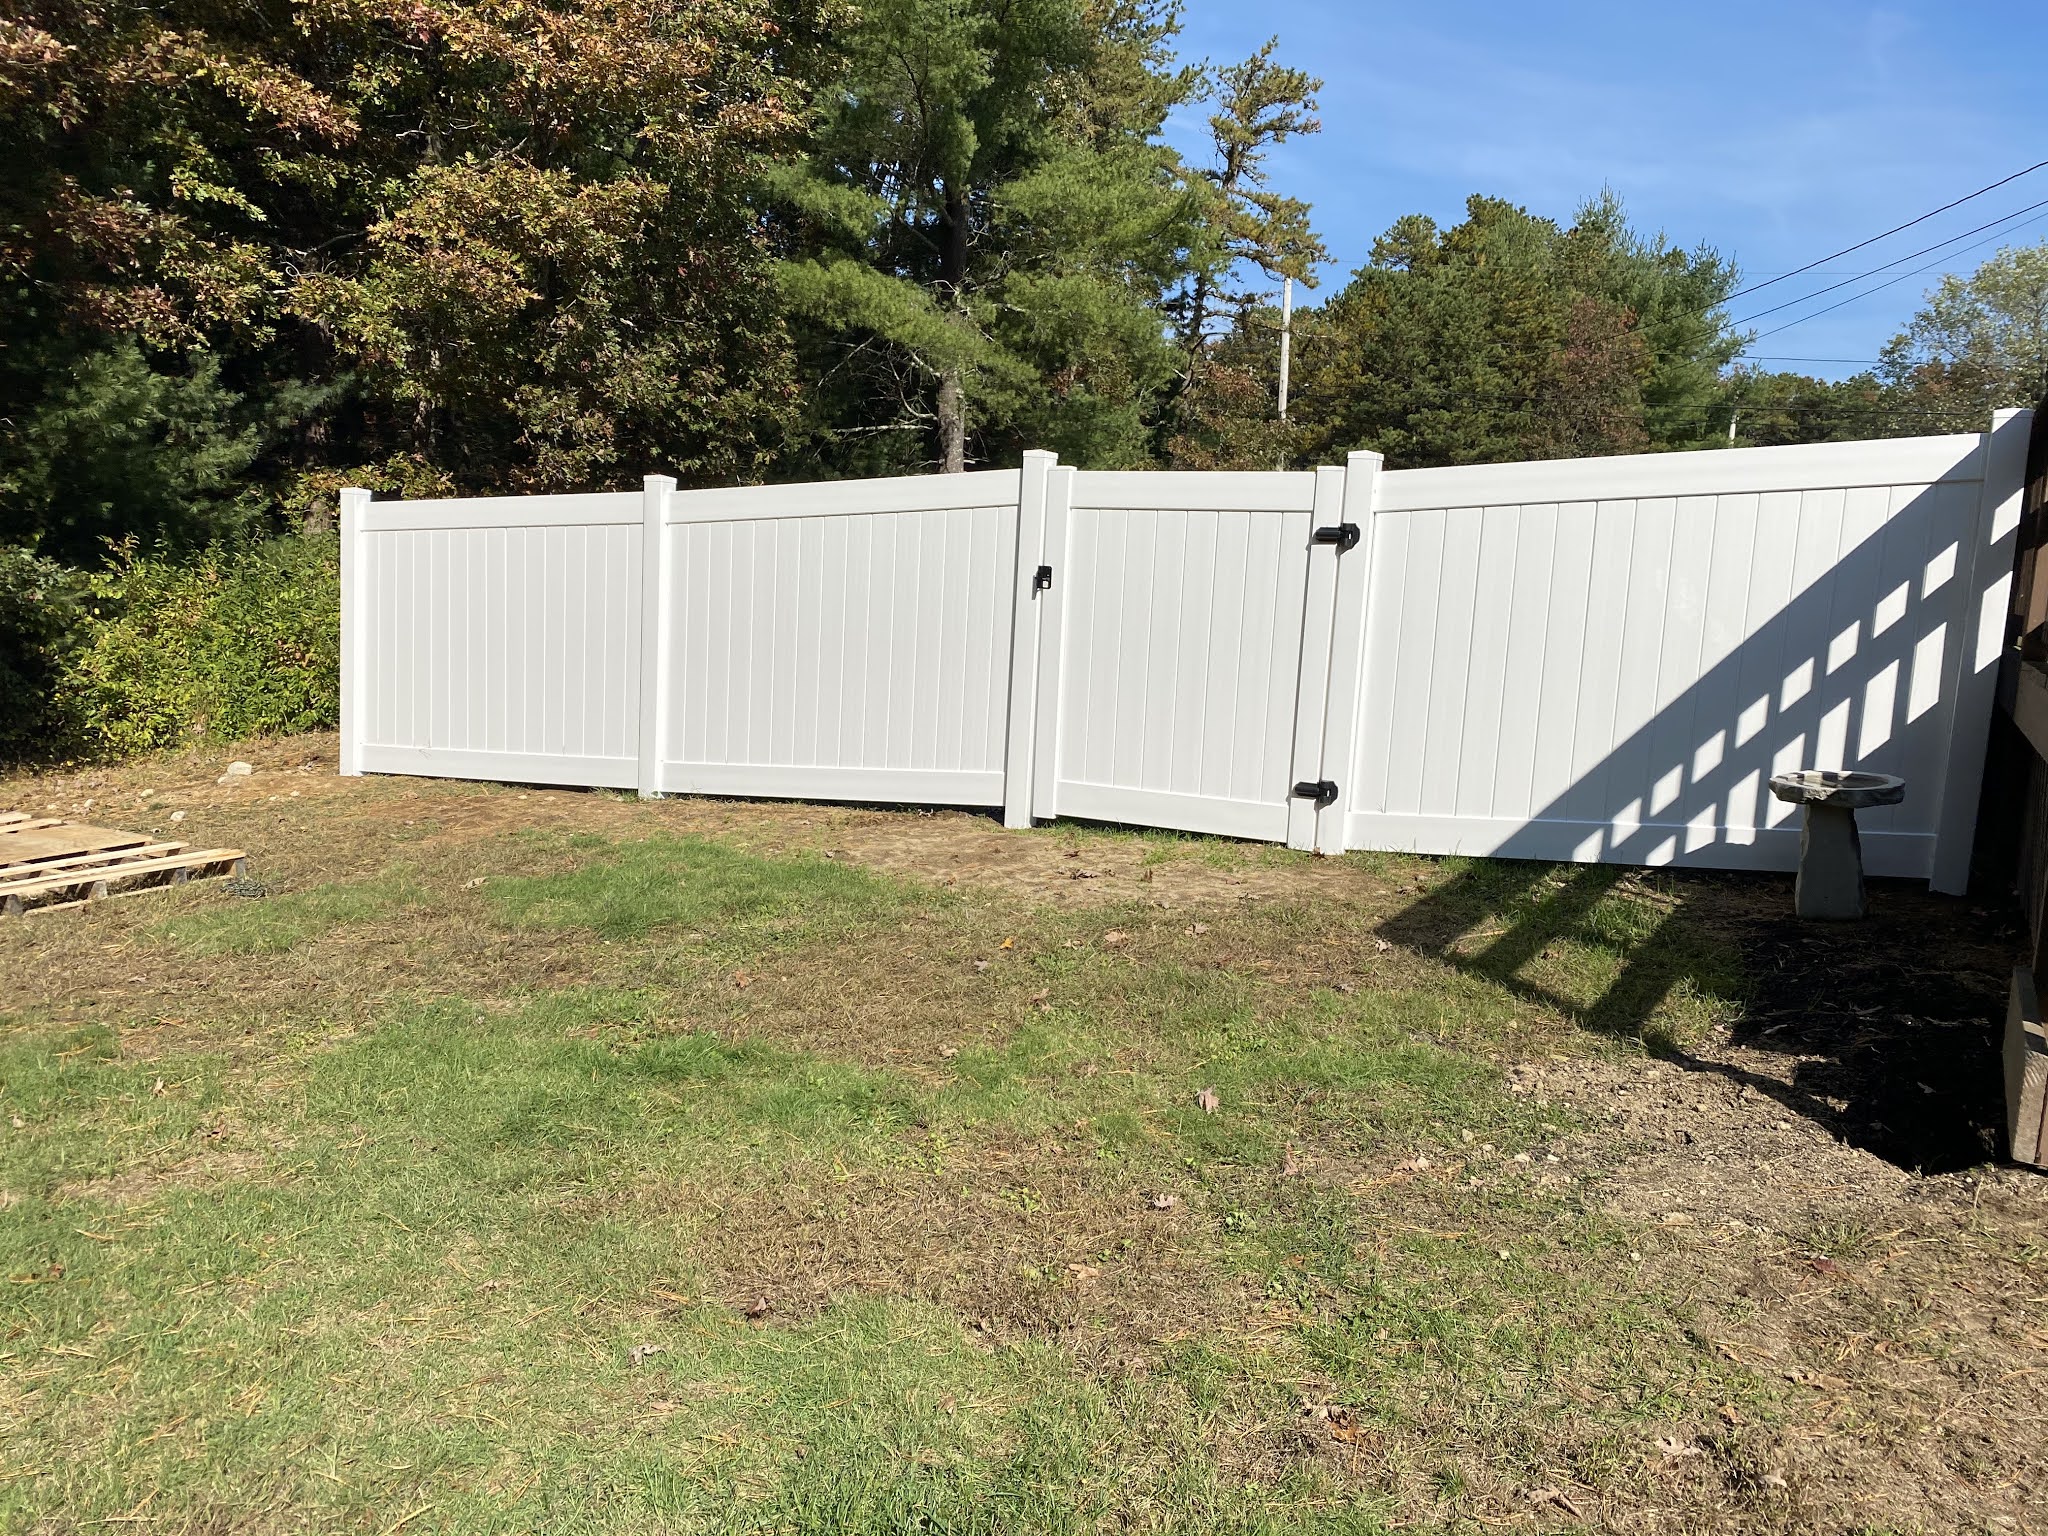
Friends, the privacy fence is fully installed! No thanks to me, but lots of thanks to my wonderful hubby! Now we just need to figure out how to continue the fence around the backyard with the wire fencing we purchased. Hopefully it's fairly easy and the rest of the process can be completed pretty quickly (fingers crossed).

On Saturday Tim got to work finishing the final two panels for our privacy fence.


Sophie and I watched. We are the best helpers around! 


Sophie has no clue that her freedom is slowly being stripped away from her. She continues to run around the fence and thinks it's a fun game to disappear behind it. Soon she will be trapped in the backyard....poor Sophie! 

Now, you might be looking at this picture thinking the fence looks slanted. Well, it is.

Our lot is sloped on both sides. There is a hill on the side of our house that isn't technically our property and belongs to the people who live behind us (the former owners of this home too) and while that piece of property used to belong to our house, before they sold it to us they split the property in order to allow for a driveway to be put in there someday. It's only 50 feet, which isn't much and they say they have no "master plan" which we are choosing to believe but that explains the slope that we can't really do much about. 

Also, while we are on the subject I am cautiously planning out what we will do if we ever hear that they want to put in a driveway...or if/when we go to sell the house. I am thinking of planting trees/shrubs along our property line to make sure we would still have privacy if they did decide to clear the wooded area.

Nevertheless. I love our new privacy fence. I am so happy we went with the final fencing and love that we now have some privacy in our backyard. It makes it much nicer when I head out there in my pajamas with Sophie in the morning!

Now, let's talk about gardening...because that has been the topic on mind recently!


I picked up these tulip bulbs from the Christmas Tree Shop and decided to plant them in our front garden by the street.


You can see the disturbed mulch area where I've planted them and I hope that it will be a nice beginning to spring. Keep your fingers crossed for me that they take and we see them in March! You can see my tree that the previous owners planted is changing colors, and the evergreens I planted are still doing well. The lavender I planted has gone past, and the annuals are long gone. I'm anxious to see how all of this will do through the winter and am keeping my fingers crossed that the evergreens make it through!

Other than the tulips I don't have any plans for this small garden. I may purchase annuals again next Spring or maybe some new perennials, but I haven't decided yet!


Now, by having the new fence it means I am given the opportunity for new gardens! I am thinking of getting evergreens for this area so there is always something colorful in front of the fence. I might do an arborvitae on the corner where the vinyl fence meets the wire fencing, but I don't want to completely cover the rest of the fence by planting tall evergreens along it. 

I am thinking about mixing some conifers with possibly rose bushes. I can't wait to play around with this area. It is tucked behind a Siberian elm tree the old owners planted so it's a little secret garden area. We aren't having a gate or anything over here so I could really bring the garden out as far as I want it which is dangerous. I need to not go crazy or I will spend all my money on plants.


The picture I just showed you meets up with this one. Along the side of our house in front of fence is a skinny area we dug out and mulched in the summer. I planned originally to just fill this with hostas but Now I'm not sure, I definitely want to include hostas since they do well in our area but I am thinking I might bring in some other plants to enjoy. 
Also, don't judge us for still having our AC in....my husband runs it almost every night and it will certainly be in until November... I just pile on the blankets over here!


Now on the other side of our house we have the vinyl fence with our gate. There is only a tiny sliver of area between the driveway and the fence so I'm not quite sure what we will do here.


It definitely needs something, but it will have to be something that doesn't need a lot of space to spread out. 


However on the back side of the fence I have lots of room to play! You can see my bird bath here as well and my plan is to fill this area with a mix of evergreens and perennials to keep it looking amazing and colorful in the spring and summer but still have enough winter interest in the fall and winter. I also would love to add a bird feeder here and want to add bird feeders and house around the yard. I might be turning into my mom....


On the back side of this fence I am thinking along the same lines as the other side. Evergreens and perennials, maybe some grasses? I need to figure out how to get all these areas filled without spending a million dollars...


I'm not even going to show you the back of the house because although eventually I would also like that to be a garden, right now it's storing extra bricks, fencing, etc... and is a disaster. I couldn't resist sharing this little face though! She was watching me out the window and just looked so sweet!

Any ideas for my new gardens? I might do a post with some inspiration pictures I've found on pinterest...so keep an eye out for that!

 Also, can you believe that two years ago tomorrow was our wedding day?! It's flown by and I am still so in love with my sweet husband! Although two years ago I never imagined being in a global pandemic on our second wedding anniversary, I am happy that through it all I have someone reliable, kind, and amazing to wake up next to every morning! Happy anniversary Tim, I love you!!!

Monday, May 25, 2020

DIY House Projects: Creating a Garden and Covering a Well Pump

One garden down, a few more to go!


My mom has always loved to garden and her parents always loved to garden too. So, I come from a line of gardeners and I think I was destined to want to dig in the dirt. But, I have no idea what I'm doing. I thought I would start small with a little area that is in our yard up by the road.

Want to see where this started?


Believe it or not, you are looking at the same view. Crazy right? When we moved in we had this ugly rusted well pipe that was broken and sticking up out of the ground. A couple of months back Tim made a call and we got the pipe itself replaced. It was bight white and while it looked better and not rusted out, I still didn't want to look at a pipe sticking out of the ground like a Mario game.

I decided my best bet was to pick up a fake rock from Amazon and I ended up purchasing this one. Any one else with weird quarantine purchases? A huge fake rock might be the number one strangest item purchased in quarantine...but I'm not trying to start a contest or anything!


So, I dug up the area and got the fake rock set up and this is what our neighbors looked at for a couple of weeks. 

Then, I got my act together and headed to Home Depot to grab some mulch, top soil and a few plants!

I planted what I picked out and realized I needed more mulch and a few more plants so I headed to Walmart to finish up this area.


My little car can't hold too much but I got what I could fit!

I plan to shape out the area a bit more and add some more mulch on the edges to neaten it up, but I'm waiting for a few more garden areas to be dug out to get more mulch. I am so pleased with how it turned out!


I realize that in the future I may need to move some of the shrubs in the future if this tree grows, but I plan to adjust my gardens as needed. There are a few annual flowers in the front, which I plan to dig out at the end of the season and hopefully replace with tulip bulbs in the fall. Hopefully this will make this area come to life early each spring and prevent me from having to buy new flowers each season.


My main focus was to get some perennials in here so I would have to do less work in the future. I also wanted to make sure several of the plants were evergreen. Our gardens contained zero winter interest, meaning that all winter long all I saw was white snow and brown dead trees. I want to have some evergreens to see all year long!


I also planted some perennial flowers and a lilac bush. I hope these will bring some color to the garden. I mostly stuck with coral, white and pink for my colors. I have seen some gardens with a ton of color and some with the focus on only a few colors and I'm still trying to decide exactly what I prefer. 

I think when I do get tulip bulbs I will try to get only pink and white tulips to keep this area fairly color-coded. (See I'm even organizing the plants.....out of control over here!)


My plan is to stay far enough away from the well pump that if they need to dig it up for any reason it won't disturb the larger plants, but if they do it's okay. Nothing that I purchased is super expensive, so if it was dug up in the future that wouldn't be the end of the world. 


I took far too many pictures of this area and I apologize for that, but I was just so darn excited to do this area all by myself!


Up next? Gardens around the walkway, which I hopefully will be able to share with you soon!

I hope it's sunny where you are today! After some intense rain on Saturday, the sun has been shining the rest of this long weekend and I love it!

Monday, May 18, 2020

DIY House Projects: Completed Front Walkway

Today I'm sharing our completed front walkway! I can't stop gushing about my husband. I am in awe with the amazing job he did!! I never knew he was so talented at home projects but this walkway is just incredible. 


It was just an empty lawn and when we stepped off the front steps it was muddy and gross.


Now, we have this......


Isn't it beautiful?!


I love the pattern and cannot believe what a great job he did!


He did such an amazing job and I'm so proud to have an amazing and talented husband.


My plan is to create gardens to surround this walkway with gardens and I can't wait to get this next part of the project done!


Also, do you see that little fluff ball in the window? :)

What do you think of the walkway? Have you ever built something like this before?

Wednesday, May 13, 2020

Our Master Bedroom

Today I am sharing with you our bedroom! Again, as I think I said during our living room tour this is what our house looks like right now. Things will change as we update our home, especially if we turn this into our forever home, which is still up in the air!

We chose the biggest bedroom for our "master bedroom" although it is only slightly bigger than the other rooms. All of the bedrooms are quite small but we managed to fit all our bedroom furniture inside this room.

Here is the view when you enter the room...


I am still torn about curtains, I'm not sure if I want them or not. When I see a picture like this I think it looks empty and needs curtains but on a day to day basis I like the simplicity of just having the shades.

When you walk into our master bedroom you see our bed immediately which always holds Sophie's blanket and "Piggy" the stuffed animal pig that Sophie sleeps with every night.


This view is from the closet in this room. I love our Pier 1 headboard and as much as I would love to have a king sized bed someday I would be so sad to not use this headboard anymore! I laughed while looking up the headboard link because I remember Tim commenting on how I made such an expensive purchase. It's on clearance right now so definitely go check it out (it's 50% off currently!) but even when it was full price it's not as expensive as half the stuff we have to buy for the house nowadays. Oh my how things change :)

Our nightstands and both dressers are from IKEA. They have held up really well and are quite sturdy. I love that there are super deep drawers but if I could go back in time I would have purchased the white ones instead of the brown-black color. These show dust SO easily and I think the white would've been a little bit easier to hide dust.


Looking back towards the doorway you can see the closet door and our tall dresser. I love the decor on top of the dresser. I just set a few things on top and ended up loving it! The let's stay home sign has never been so relevant.


Our long dresser holds our tv and some personal care products. I also have two hampers, one for clothes and one for towels, blankets and sheets. I purchased these off Amazon and they are the XL and L size respectively. 


One more view back up the bed. Our comforter was a wedding gift and it's so soft! Our lamps were purchased at Target and are so simple but I like them that way. 

So that is our bedroom so far. Like I said, we will continue to make updates to our home so I'm sure someday you'll see this room and it will look totally different!


Monday, May 11, 2020

DIY House Projects: Walkway Progress

After an unintentional week off, I'm back! Guys, this is the beginning of week 9 of me working from home. I can't believe that I've actually been working from home all this time, I never imagined. I did assume I would get so much done if I worked from home each day but I never thought I wouldn't be able to walk outside without a dog attached to me. Leaving her inside means barking, yelping and pawing at the windows so unfortunately if Tim isn't home I'm not able to get outside to get any outside work done. On the weekends Tim has been working on the walkway so I wanted to share the progress with you guys today!

Please note that I am not able to help Tim with this project because he is a perfectionist and I have no patience. If I did the walkway it would come out much less perfect because I wouldn't be taking the time to make things perfect. Lucky for me with this perfectionist husband of mine it will look perfect :)


Tim spent this past Saturday getting all the stakes in and measuring out where the walkway should line up. He wanted to make sure that the walkway sloped away from the house so we won't get any water pooling near the house. 


That perfectionist hubby of mine spent so much time leveling everything out and making sure all his measurements were perfect. I would've probably just said that it looks good and been done with it, which is why I'm not helping :)


Once everything was all lined up it was time to fill in the gravel!


Sophie and I supervised the process. Tim was seriously kicking butt this past weekend!


Progress with the gravel!


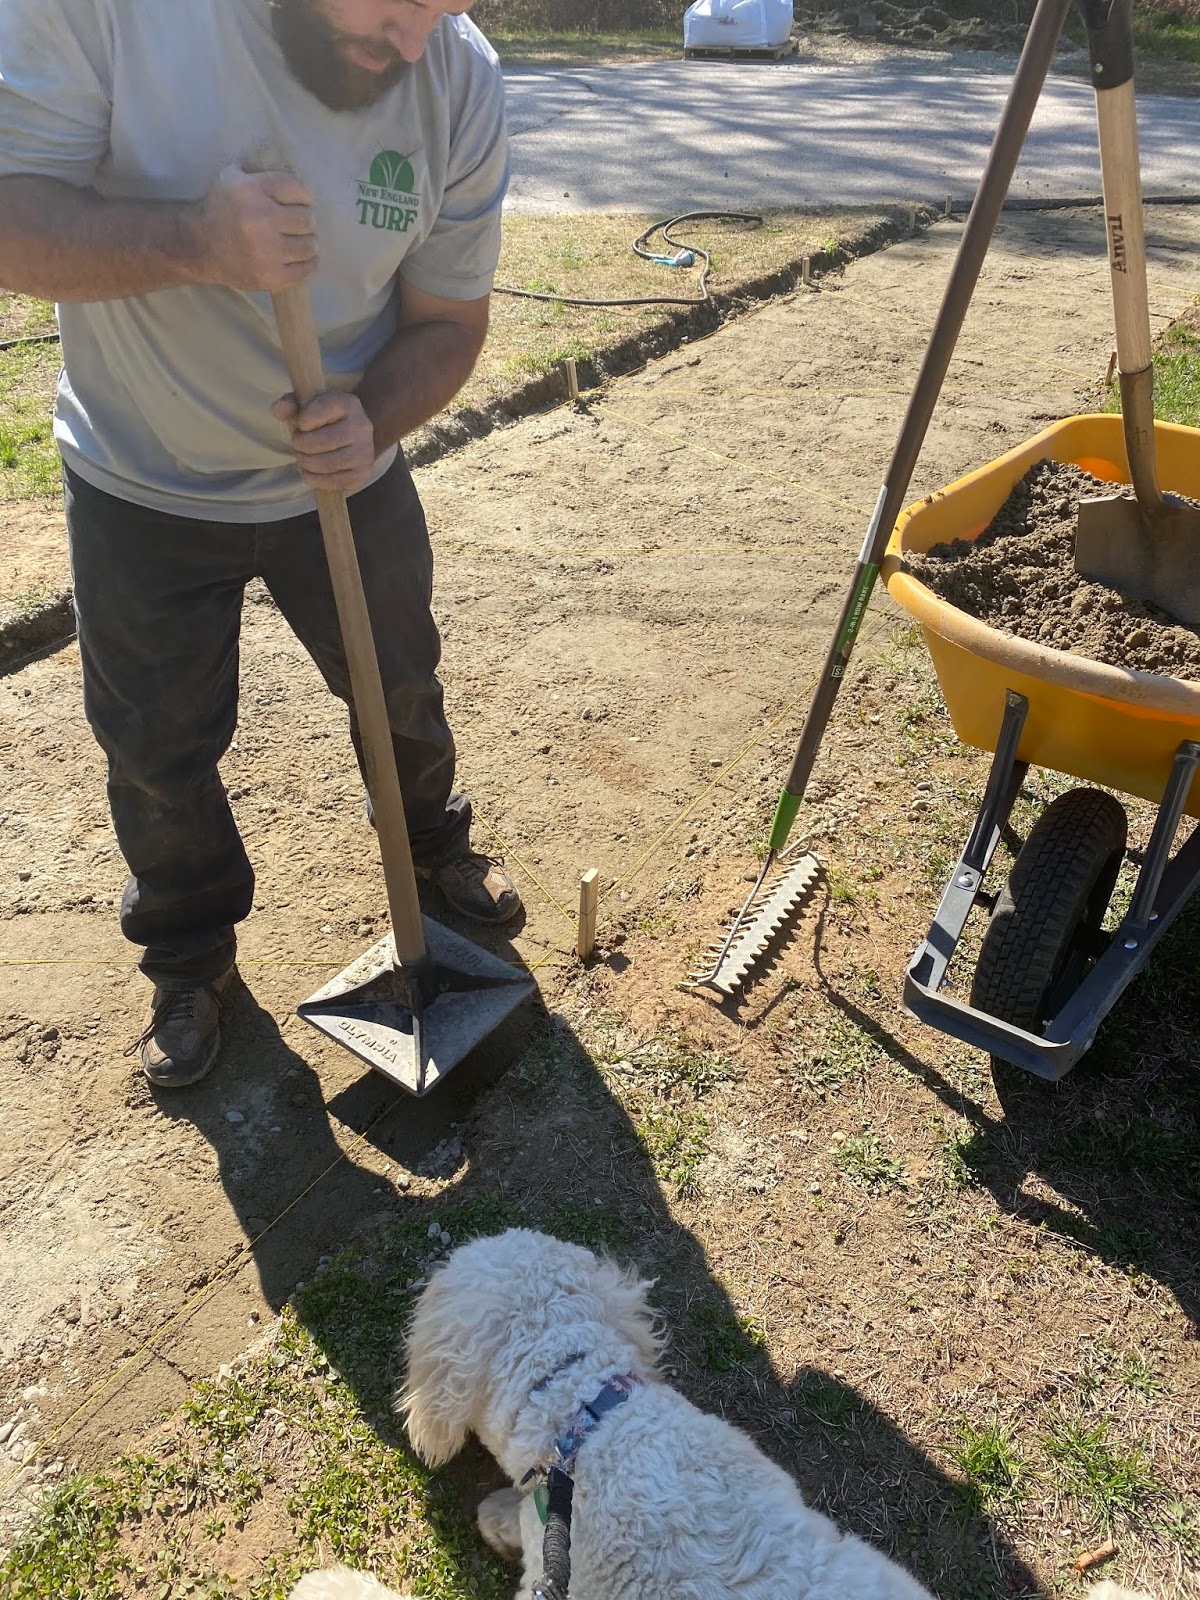
We borrowed the tool seen above from my parents and it really packs everything in. See the difference between the left side and the right side?


This was almost the end point!


After all the gravel is in then Tim will lay the pavers and use sand to keep them in place. I am so excited we are getting to the end point of this walkway project and I'm sure that Tim is ecstatic as well but he's also probably wondering what is next for him :)


Sophie is checking out what her dad is doing! Also this is why I have to keep her on a leash while we are doing anything because she will stick her face right in whatever you are doing, making a project like this difficult!


But it doesn't stop her from watching like a true fan!

Now are you ready for what the walkway looks like as of today?

....


The crushed gravel is in!! 


Guys. I'm pretty sure the next time I update you it will be completed! I will be sharing before and after pictures of how this changes our front yard, I'm so excited!

Once the walkway is complete, I plan on making the front garden surround them. If you look at the picture above I am going to pull the garden all the way up to the walkway and plan on getting boxwoods to line the walkway on both sides. The garden that you can see in the back I plan to wrap all the way around the walkway. I also want to get solar lights for the sides of the walkway.

I can just picture mini pumpkins lining the walkway during fall :)

So those are the plans! Do you have any ideas that I haven't mentioned? I would love to hear them!